How I built my own AI video server from a used Dell, in 4 steps
Oct. 26, 2026 · The Working Bits
Every AI video clip from a paid service costs credits. So I built my own machine to make them for free: a used Dell server with a data center graphics card, about $2,100 all in. Here's exactly how I did it, from buying the parts on eBay to telling Claude what I wanted it to do.
Rather watch than read? The build video is about 2½ minutes. Build footage is my own; robot clips are AI-generated on lab01. Watch on YouTube.
At a glance
- Total cost: about $2,100, all bought used
- Hardware assembly: about 1 hour
- Whole job: about a day and a half, mostly software and settings
- Skill level: if you've built a desktop PC, you can do this
- What it does: makes a 5-second AI video clip in about 6½ minutes, for $0 per clip
Step 1: Get the parts (I used eBay)
Businesses retire servers every few years, and a lot of them end up on eBay for a fraction of what they cost new. That's where I got everything.
What I bought:
- The server: a Dell PowerEdge R730xd with two Intel Xeon E5-2680 v4 processors (28 cores total), 128 GB of memory, a PERC H730 drive controller and an 1100-watt power supply.
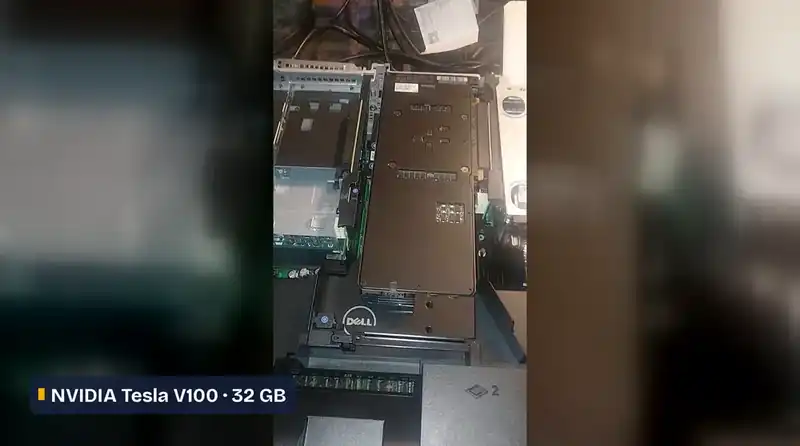
- The graphics card: an NVIDIA Tesla V100 PCIe with 32 GB of video memory. It's a data center card from 2017, old by AI standards but still strong for the price.
- Storage: six 1.2 TB and one 900 GB 10K SAS hard drives for bulk storage, a 256 GB SATA SSD, and a 256 GB NVMe drive on a PCIe adapter card.
- The GPU power cable: the V100 needs a special power cable to get power from the server. It doesn't come with the card.
What I learned buying:
- Ask what's included. My drive caddies showed up without their screws, and I had to wait for those. Before you buy, ask the seller if the caddies come with screws.
- Order the GPU power cable at the same time as the card. I didn't, and I waited on it.
- Check seller ratings and the return policy. Used server parts are usually fine, but you want a way out if something arrives dead.
- Mind the airflow. The V100 has no fan of its own. It counts on the server's fans blowing through it, so it belongs in a server like this, not a regular PC case.
Step 2: Unbox and check everything
Before you put anything together, lay it all out and check it over:
- Look for shipping damage: bent metal, rattling parts, cracked plastic.
- Count the small stuff: drive caddies, screws, cables. This is where I'd have caught the missing caddy screws.
- Pop the lid and look inside: make sure the memory and processors are seated and nothing came loose in shipping.
- Match parts to your list, so you know what's missing before you start, not halfway through.
Step 3: Put it together (about an hour)
Once every part was there, the hardware went together in about an hour:
- Mount the drives in the caddies. Each hard drive screws into a caddy, the little tray that slides into the server.
- Slide the caddies into the front bays until they click.
- Install the V100 in a riser. The graphics card sits sideways in a riser, a bracket that holds expansion cards, inside the server.
- Connect the GPU power cable to the card.
- Add the NVMe drive on its PCIe adapter and the SATA SSD.
- Close it up, plug it in and power it on. Server fans are loud at first. They calm down once it finishes starting up.
Tip: take photos as you go, or film it if you can get help. I filmed mine by myself, holding the phone while I worked, and next time I'll use a stand.
Step 4: Install the software
This is where most of my day and a half went. Two parts:
Part A: Install Linux
I used Ubuntu Server, a free version of Linux made for machines like this. The basic steps:
- Download Ubuntu Server from ubuntu.com.
- Put it on a USB stick with a free tool like Rufus or balenaEtcher.
- Plug the stick into the server and turn it on. On Dell servers, press F11 while it starts to open the boot menu, then pick the USB stick.
- Set up the drives. The PERC controller decides how the server sees the drives. You can set it up during startup or through the server's built-in management screen, called iDRAC.
- Follow the installer and put Linux on the SSD. Turn on OpenSSH when it asks, so you can control the server from your regular computer.
Part B: Install Claude and tell it what you want
Here's the part that saved me the most time. Instead of setting up every program by hand, I installed Claude Code, Anthropic's AI assistant that runs right on the server, and told it what I was trying to build.
Installing it takes one command, from Anthropic's own instructions:
curl -fsSL https://claude.ai/install.sh | bashThen you start it by typing claude and sign in through your web browser. You need a paid Claude plan (Pro or higher). The free plan doesn't include Claude Code.
Then I told it the goal in plain English, along these lines: set this server up to make AI videos on the V100, keep an eye on the temperature, and back everything up. From there, Claude installed and set up the pieces:
- The NVIDIA graphics driver (a version that still supports the older V100)
- Docker, which keeps the AI software in its own neat box
- ComfyUI, the program that runs the AI video models
- Wan, the free open AI video model
- Tailscale, so I can reach the server securely from anywhere
- Its own tools for fan control, temperature logging and backups
The tweaking took longest: getting the right driver for an older card, tuning settings so clips came out right, and keeping the heat in check. Claude did the typing. My job was explaining what I wanted and checking the results.
So what can it do?
It makes a 5-second AI video clip in about six and a half minutes. That's slow next to paid services like Runway, but it costs nothing per clip, so I can line up a batch and let it run overnight. The robot clips in my home robots story were animated right here.
What went wrong: the AI model doesn't always follow directions. It kept putting the robot's light ring on its face, so I had to make reference pictures to fix it. And on a warm night the graphics card's memory hit 84°C, one degree under its limit. Now it runs with a power cap and pauses itself if it gets too hot.
My take: For me, it was worth it. I still use Runway for the hard shots because it's faster and better. But for about $2,100, I've got a machine that makes video while I sleep, and I learned a ton building it. If you've built a PC before, you can do this. Just check what comes in the box, order the power cable with the card, and let an AI assistant handle the boring setup.
How this was made: This is my own build, my own footage and my own numbers. I used AI (Claude, by Anthropic) to help write it up. Claude is also part of the build itself, so take my praise for it with that in mind. Prices and parts on eBay change all the time, so treat my $2,100 as a rough guide.
References & credits
- Anthropic, "Claude Code: Advanced setup" (install command, system requirements and sign-in).
- Canonical, "Download Ubuntu Server."
More to read
- From MKUltra to AI: the long history of messing with your mind
- Forced to pick, two big AIs split along party lines
- Real race, fake videos: AI ads take over the Texas Senate fight
- The first AI election: $137 million in AI-made ads, and the AI money behind the races
- How to spot an AI political ad before you vote (or share it)
- What Trump is actually doing about AI, and what Americans think of it